A No-Database Link Shortener on Cloudflare Workers
A short, memorable URL is handy for sharing links, and a Cloudflare Worker is a cheap way to run one. There’s no database involved: redirects live in a single file that you edit and push. Here’s the full setup.
Set up the worker directory
To get started, use Cloudflare’s create-cloudflare CLI to create your project:
npm create cloudflare@latest -- link-shortener
Answer the prompts:
What would you like to start with?
● Hello World example
Which template would you like to use?
● Worker only
Which language do you want to use?
● TypeScript
Do you want to add an AGENTS.md file to help AI coding tools understand Cloudflare APIs?
● No
Do you want to use git for version control?
● Yes
Do you want to deploy your application?
● No
This will create the scaffolding needed for your worker, including wrangler, which we’ll use to deploy.
Set up the redirects file
Create a file at src/redirects.ts:
const redirects: Record<string, string> = {
  e: 'https://example.com',
  a: 'https://another.example',
};

export default redirects;
Within that Record you set up all your redirects: the key is the short URL slug, the value is the target URL.
The actual redirect
The link-shortener package is published to my Forgejo registry. Point the scope at it once, in your project’s .npmrc:
@michael.thms.uk:registry=https://code.thms.uk/api/packages/michael/npm/
Then install it:
npm install @michael.thms.uk/link-shortener
Then clear out the existing src/index.ts and replace it with the following:
import { createShortener } from '@michael.thms.uk/link-shortener';
import redirects from './redirects';

export default createShortener({
  redirects,
  // Where to send requests to `/`, e.g. to a personal profile. Without this, `/` returns a `404`.
  rootRedirect: 'https://example.com/',
}) satisfies ExportedHandler<Env>;
That’s it. Unknown slugs return a 404, and any query string on the short URL is passed on to the target. There are a few options to tweak this behaviour:
status: the redirect status code:301,302,307or308. Defaults to302. Browsers cache301and308aggressively, so stick with302or307while your links might still change.acceptTrailingSlash: treat/slug/the same as/slug. Defaults tofalse.stripQueryParams: drop the incoming query string instead of passing it on. Defaults tofalse.notFoundPage: custom HTML to return for unknown slugs.
The package isn’t tied to Cloudflare: it works with anything that speaks the Fetch API, including Deno, Bun, and Node.js (with a small adapter). The README has examples for each, along with the full details of every option.
Tests
What tests you set up is up to you. In my case I have created a test that iterates the entire redirects map.
I do this because the link-shortener library will drop entries where the target is not a valid URL, and so this is my insurance against accidentally writing incorrect redirects that would simply 404.
To do that, clear out the existing test/index.spec.ts and replace it with the following:
import {SELF} from 'cloudflare:test';
import {describe, it, expect} from 'vitest';
import redirects from '../src/redirects';

describe('Redirect Worker', () => {
  it.each(Object.entries(redirects))('redirects /%s to %s', async (slug, target) => {
    const response = await SELF.fetch(`https://example.com/${slug}`, {redirect: 'manual'});
    expect(response.status).toBe(302);
    expect(response.headers.get('location')).toBe(new URL(target).href);
  });
});
You may wish to test any other configuration option (such as the provision of a rootRedirect) as well.
Set up your route
Now we need to tell Cloudflare which domain to use for our URL shortener. There are a few ways of doing this. You could use a path prefix and redirect anything from https://example.com/g/{foo}. In that case you’ll need to use a regular route rather than a custom domain. The library looks up the whole path, so your slugs need to include the prefix (e.g. 'g/foo').
As I want a short URL, I’m using a short domain without a path prefix: the whole domain is used for shortening.
The best way to define this is using the routes key in the wrangler.jsonc file. You can find the full details of the various options for defining routes in the Wrangler documentation.
To define a domain-based route, add the following routes key to the existing wrangler.jsonc file:
{
  "routes": [
    { "pattern": "go.thms.uk", "custom_domain": true }
  ]
}
Create a deploy action for automatic deployment
To have your link shortener deployed automatically every time you push a change, we’ll use Forgejo Actions.
Within the repo, create a file at .forgejo/workflows/deploy.yml and paste the following:
name: Deploy

on:
  workflow_dispatch:
  push:
    branches: [main]

jobs:
  deploy:
    runs-on: ubuntu-latest
    steps:
      - uses: actions/checkout@v4

      - uses: actions/setup-node@v4
        with:
          node-version: 26
          cache: npm

      - name: Install
        run: npm ci

      - name: Test
        run: npx vitest run

      - name: Deploy to Cloudflare Workers
        run: npm run deploy
        env:
          CLOUDFLARE_API_TOKEN: ${{ secrets.CLOUDFLARE_API_TOKEN }}
          CLOUDFLARE_ACCOUNT_ID: ${{ secrets.CLOUDFLARE_ACCOUNT_ID }}
(If you are using GitHub, place this at .github/workflows/deploy.yml instead.)
Set up the Cloudflare API token
To authenticate the deployment, we need to create a Cloudflare API token.
Go to Manage Account > Account API Tokens and create a token. You need to add two policies:
- A policy scoped to your domain, with the following permissions:
- Developer Platform > Workers Routes: Read & Edit
- DNS & Zones > Zone: Read & Edit
- A policy scoped to your account, with the following permissions:
- Developer Platform > Workers Scripts: Read & Edit
- Account & Billing > Account Settings: Read
Complete the setup process, and you’ll be given your Account ID and your API token. Make a note of both.
Provide your secrets to Forgejo
Create your repository if you haven’t yet, then go to your repository settings and find Actions > Secrets in the left column. Add two secrets: CLOUDFLARE_ACCOUNT_ID and CLOUDFLARE_API_TOKEN. It should look like this:
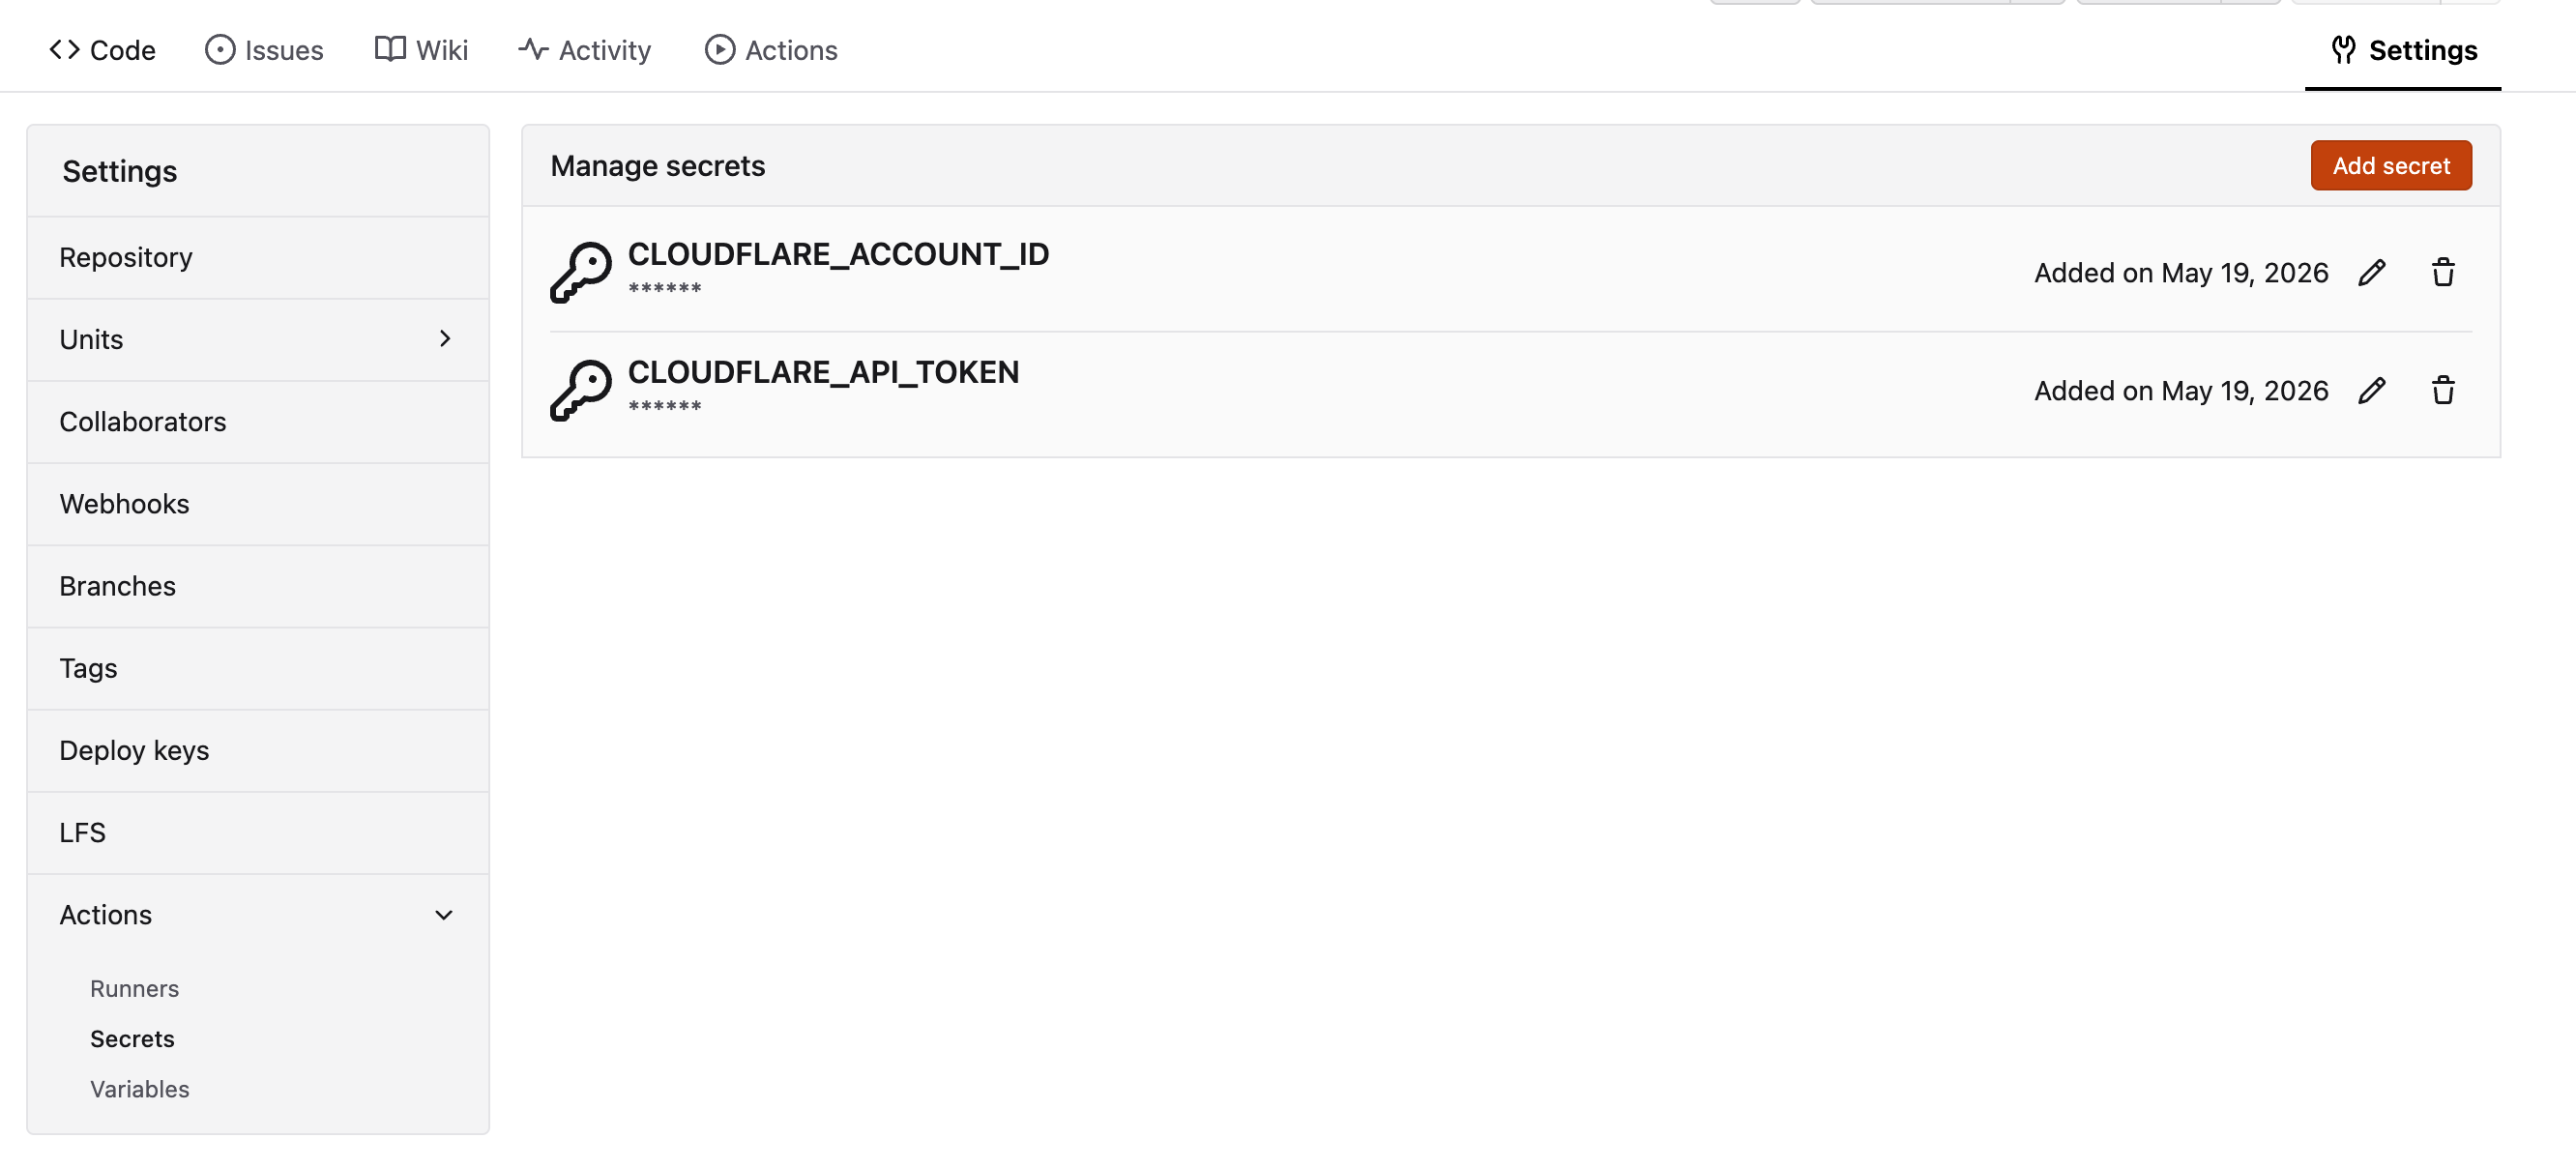
(If you are using GitHub, this lives at Settings > Secrets and variables > Actions > Repository secrets.)
Deploy and test
Push your code, and it should automatically be deployed to Cloudflare Workers. Visit one of your short URLs to test.
Any time you want to add a short URL or adjust an existing one, just update redirects.ts and push to Forgejo/GitHub.
That’s all there is to it: no database, no admin UI, just a single file under version control, which also gives you a full history of every link you’ve ever created. The trade-off is that every change needs a push and a deploy, but for a personal link shortener that’s a price I’m happy to pay.