Auto-Deploying a static site from Forgejo to CloudFlare Pages
When migrating from GitHub to my self-hosted Forgejo instance, I’ve lost the ability to use GitHub Pages to host a couple of static pages I have been hosting on GitHub.
One alternative is CloudFlare Pages. And whilst CloudFlare Pages has a direct integration with GitHub to deploy from GitHub to CloudFlare, no such direct integration exists with Forgejo.
This post walks us through setting up a Forgejo Action that will auto-deploy to CloudFlare Pages on every push.
Note: If you want to fully self host your static site, you may wish to have a look at how I’m self hosting my blog using Forgejo, Caddy, and Tailscale
Prerequisites
Here is what you need before you get started:
- A Forgejo account on an instance with a runner configured. If you are self hosting look at the Forgejo docs on setting up a runner.
- A CloudFlare account.
Creating your CloudFlare Page
Before you can deploy from your Forgejo action you must manually create a CloudFlare Page, and upload the first deployment manually by uploading it in the CloudFlare UI:
- Go to dash.cloudflare.com, and under Build > Compute, find Workers & Pages.
- Click the blue Create Application button.
- Find the small “Looking to deploy Pages? Get started” text underneath the card - CloudFlare are hiding it these days.
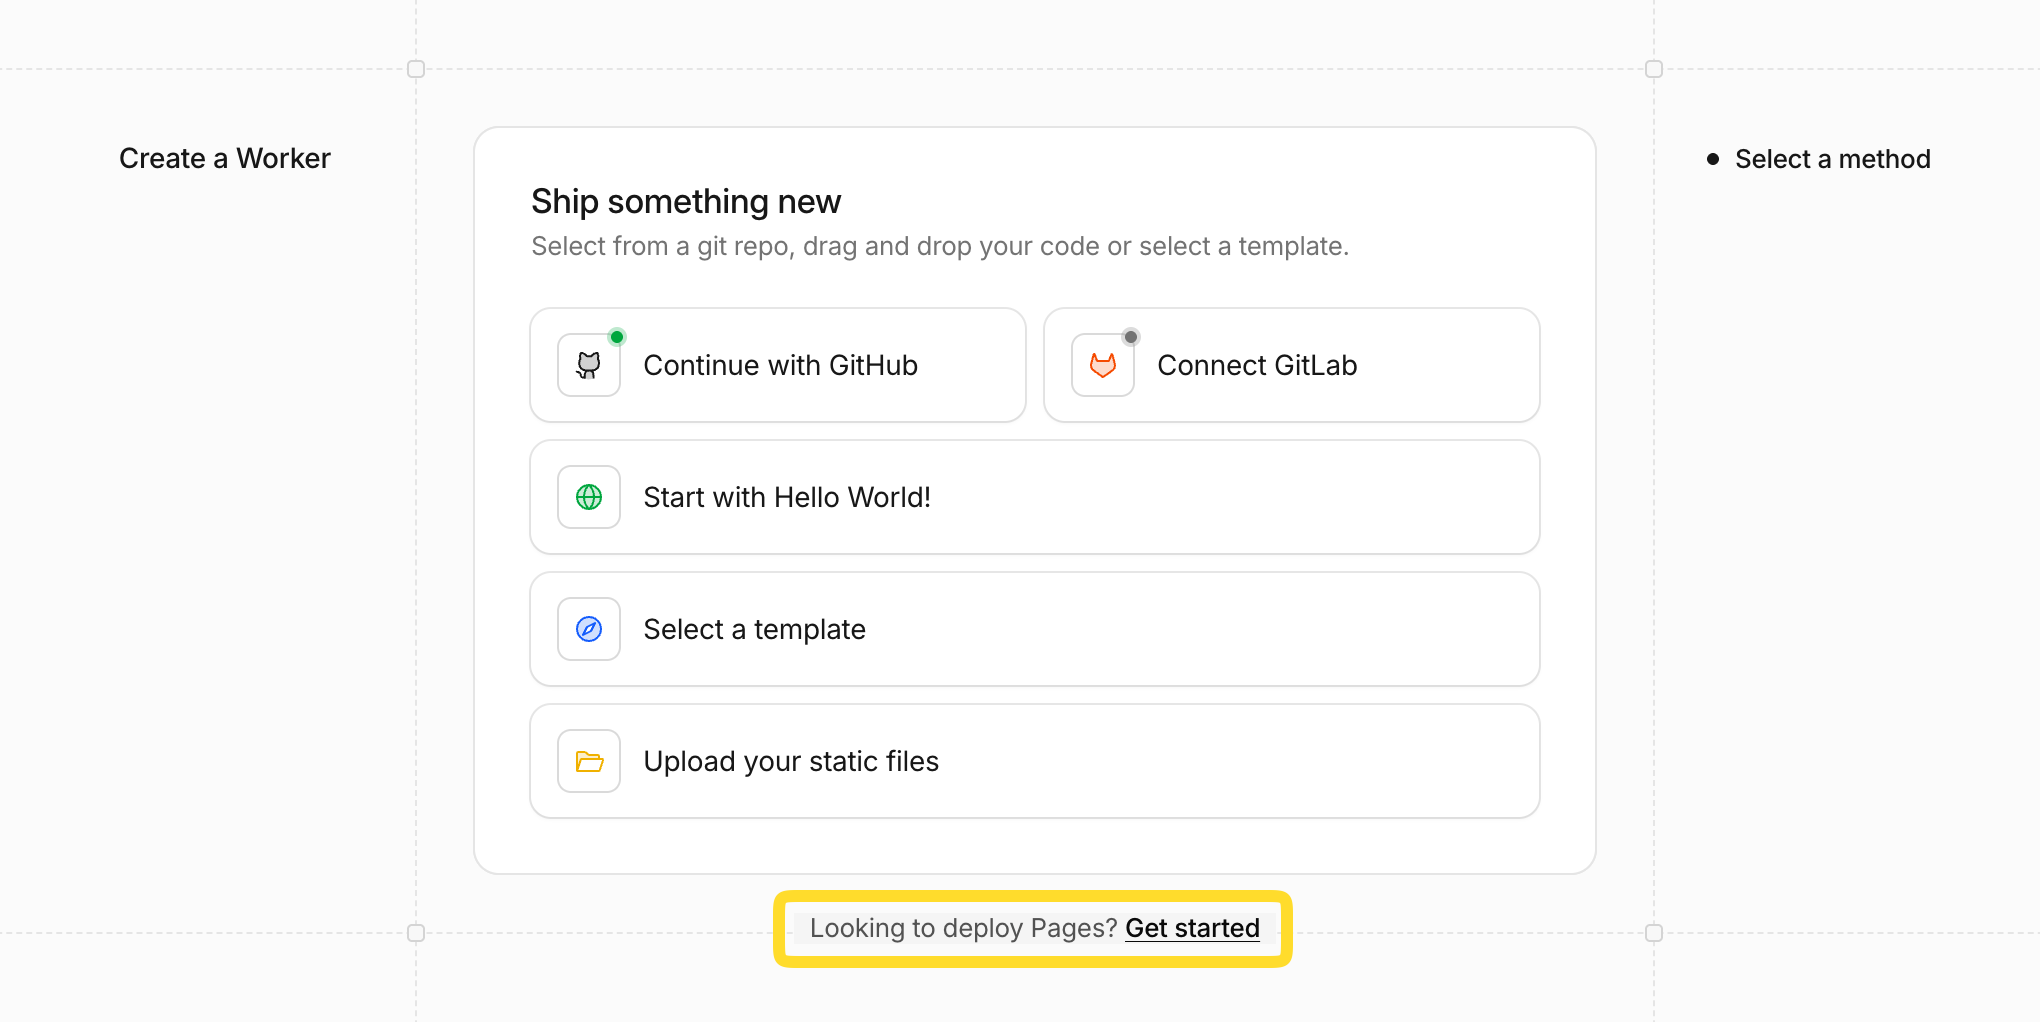
- On the next page for “Drag and drop your files” click Get Started.
- Give it a name such as
my-pageand click ‘Create project’. You’ll need that name later, as that’s how CloudFlare identifies your page. - Upload the files or folders for your first deployment (You could always just upload a folder with a single
index.htmlfile if you wanted to at this stage). - Click ‘Deploy site’
Your page is now ready, and accessible at https://my-page.pages.dev (or whatever else you may have chosen for your name).
You can set up your custom domain now, if you wish, as well as any other configuration options.
Getting a CloudFlare Access Token and Account ID
Next we’ll need to get your Account ID and generate an Access Token for the automated deployments:
- Go to Manage Account > Account API Tokens and click ‘Create Token’.
- Assign the correct permissions: You’ll need Read and Edit access for Pages (which is found under the Developer Platform heading). Set your expiration and/or IP address restrictions if desired.
- On the next page you’ll be presented with your Account ID and your API Token. Take a note of both. You’ll need them.
Configure your Forgejo Action
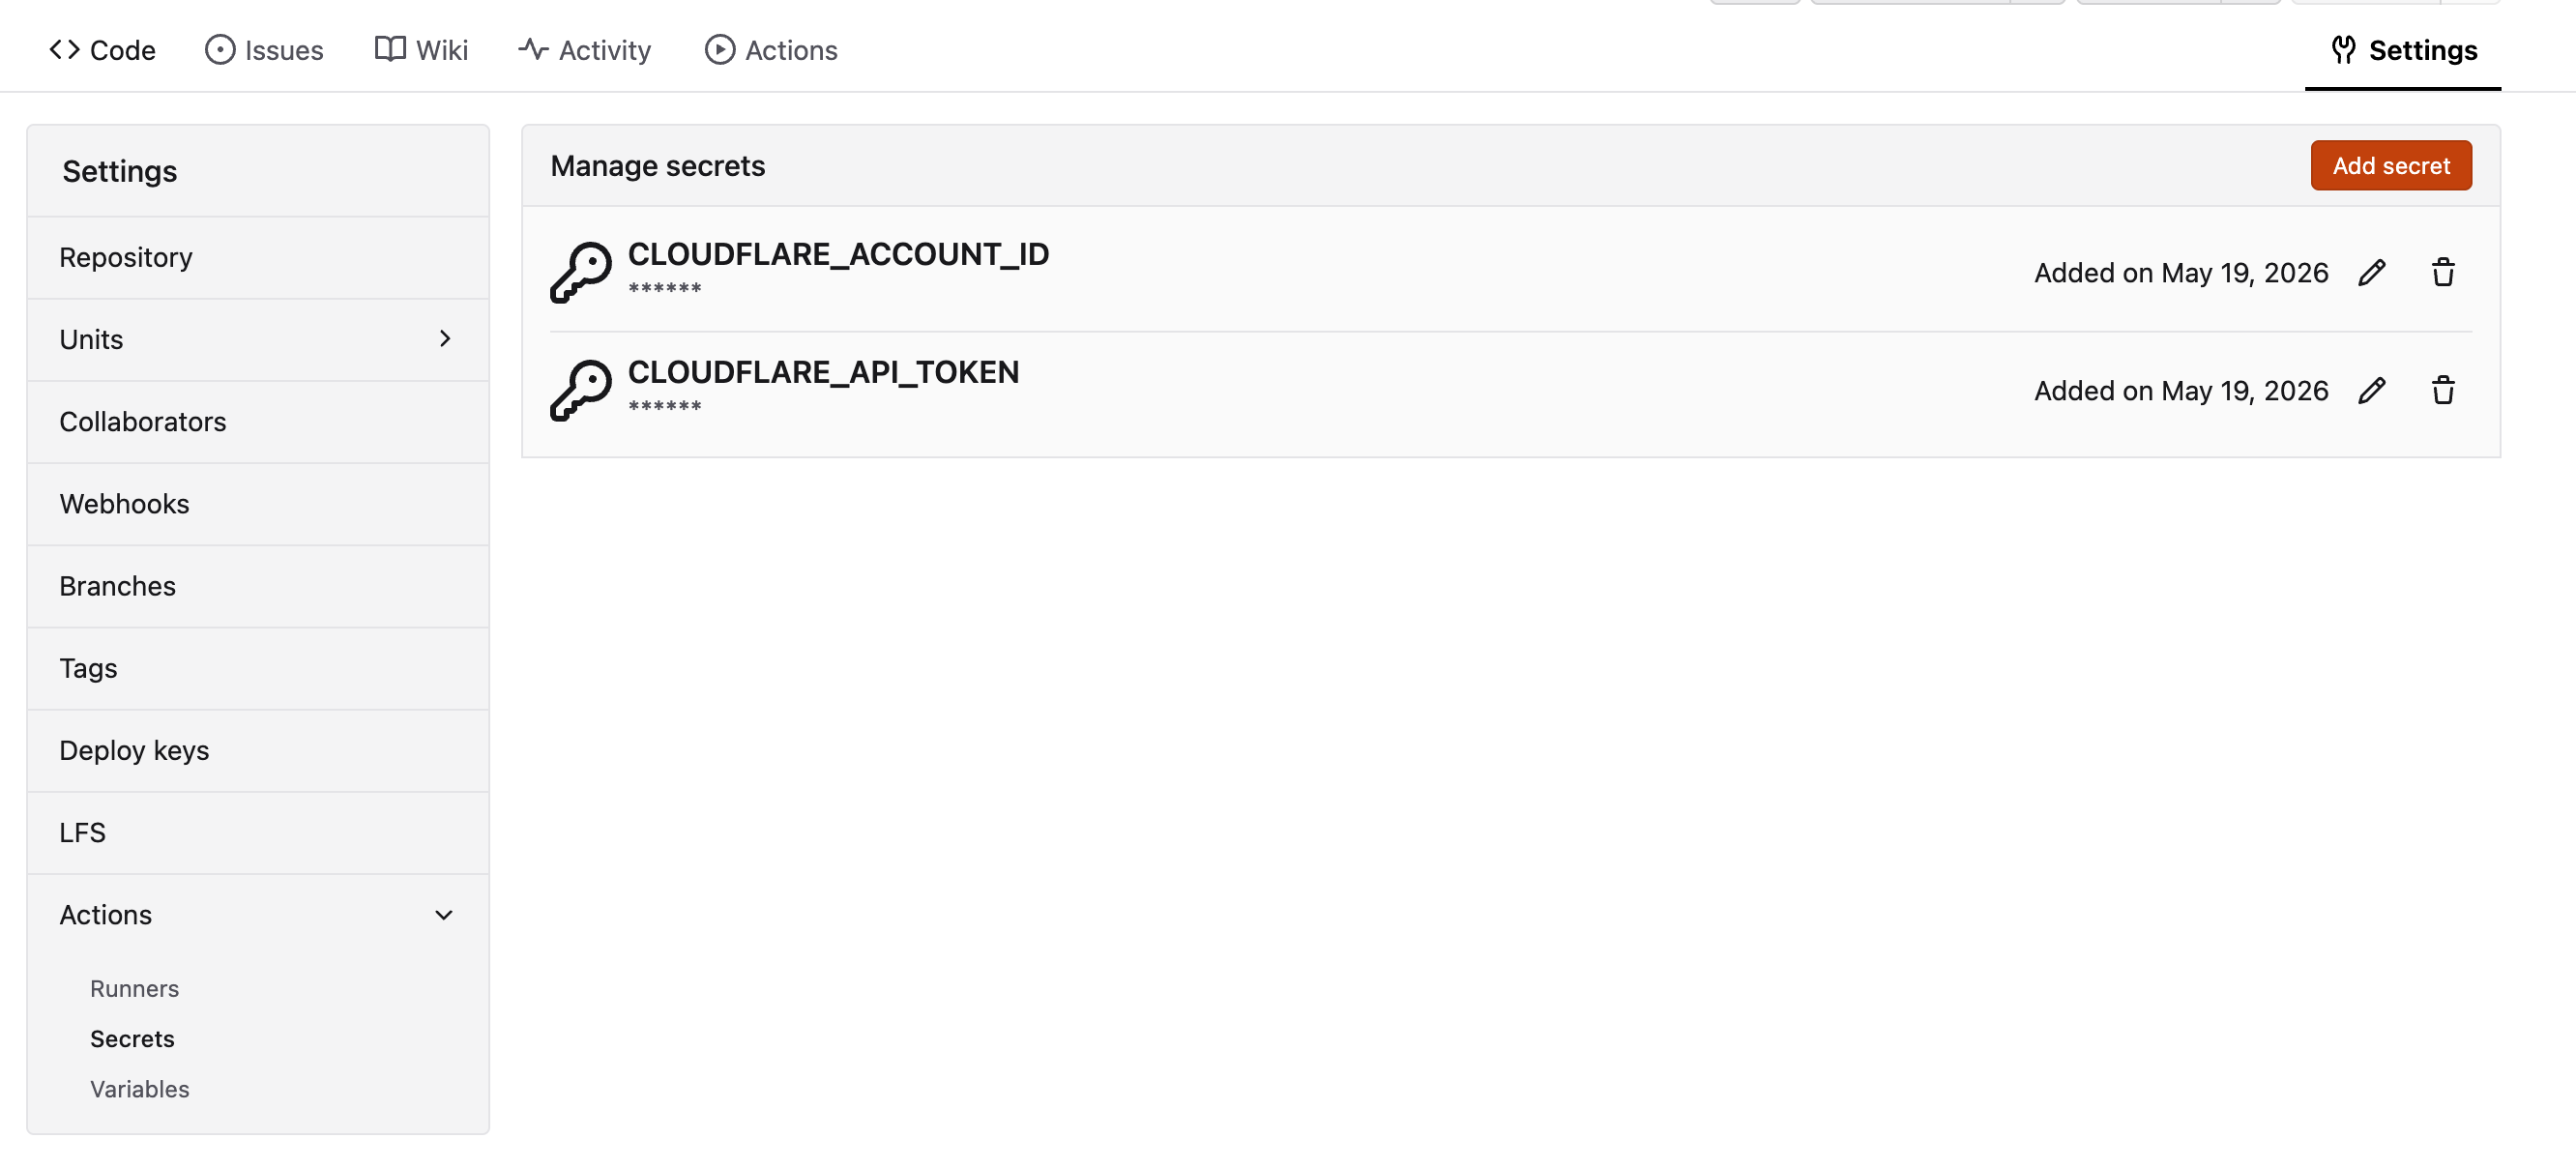
We’ll need to provide the Account ID and Token to Forgejo as Secrets. That way they stay out of our code and hidden from prying eyes: Go to your repository settings, and find Actions > Secrets in the left column. Provide two secrets: CLOUDFLARE_ACCOUNT_ID and CLOUDFLARE_API_TOKEN. It should look like this:
Creating your Forgejo Action
In your repository create a file at .forgejo/workflows/deploy.yml.
Paste the following content:
on:
  workflow_dispatch:
  push:
    branches: [main] # replace branch name, if you are not using `main`

jobs:
  deploy:
    runs-on: ubuntu-latest
    steps:
      - uses: actions/checkout@v4

      - uses: actions/setup-node@v4
        with:
          node-version: 22

      - name: npm install
        run: npm install

      - name: build
        run: npm run build

      - name: Deploy to Cloudflare Pages
        run: npx wrangler@latest pages deploy ./dist --project-name=my-page # replace `./dist` with your build output directory, and `my-page` with your name chosen earlier
        env:
          CLOUDFLARE_API_TOKEN: ${{ secrets.CLOUDFLARE_API_TOKEN }}
          CLOUDFLARE_ACCOUNT_ID: ${{ secrets.CLOUDFLARE_ACCOUNT_ID }}
This action makes the following assumptions:
- You will be deploying from your
mainbranch - you can adjust the branch on line 4 if needed. - We’ll also add the
workflow_dispatchtrigger. This will enable a button in the Forgejo UI to allow you to trigger a manual deploy should you wish to do so. - You are using
npm installandnpm run buildas your build process. If you don’t need those, you can remove those steps. if you need different steps you can replace or add them. - Your build output directory is
./distand your page namemy-page- replace on line 23 if needed.
If you don’t use any build process you can skip the install and build steps. E.g. I have one repo that is just static HTML, CSS and JS. In this case I just need to delete the .git and .forgejo directories before deployment:
on:
  workflow_dispatch:
  push:
    branches: [main]

jobs:
  deploy:
    runs-on: ubuntu-latest
    steps:
      - uses: actions/checkout@v4

      - uses: actions/setup-node@v4
        with:
          node-version: 22

      - name: Delete unwanted files
        run: |
          rm -rf .forgejo
          rm -rf .git

      - name: Deploy to Cloudflare Pages
        run: npx wrangler@latest pages deploy ./ --project-name=my-page
        env:
          CLOUDFLARE_API_TOKEN: ${{ secrets.CLOUDFLARE_API_TOKEN }}
          CLOUDFLARE_ACCOUNT_ID: ${{ secrets.CLOUDFLARE_ACCOUNT_ID }}
And that’s it - your site will be deployed to CloudFlare Pages automatically every time you push to your Forgejo instance.